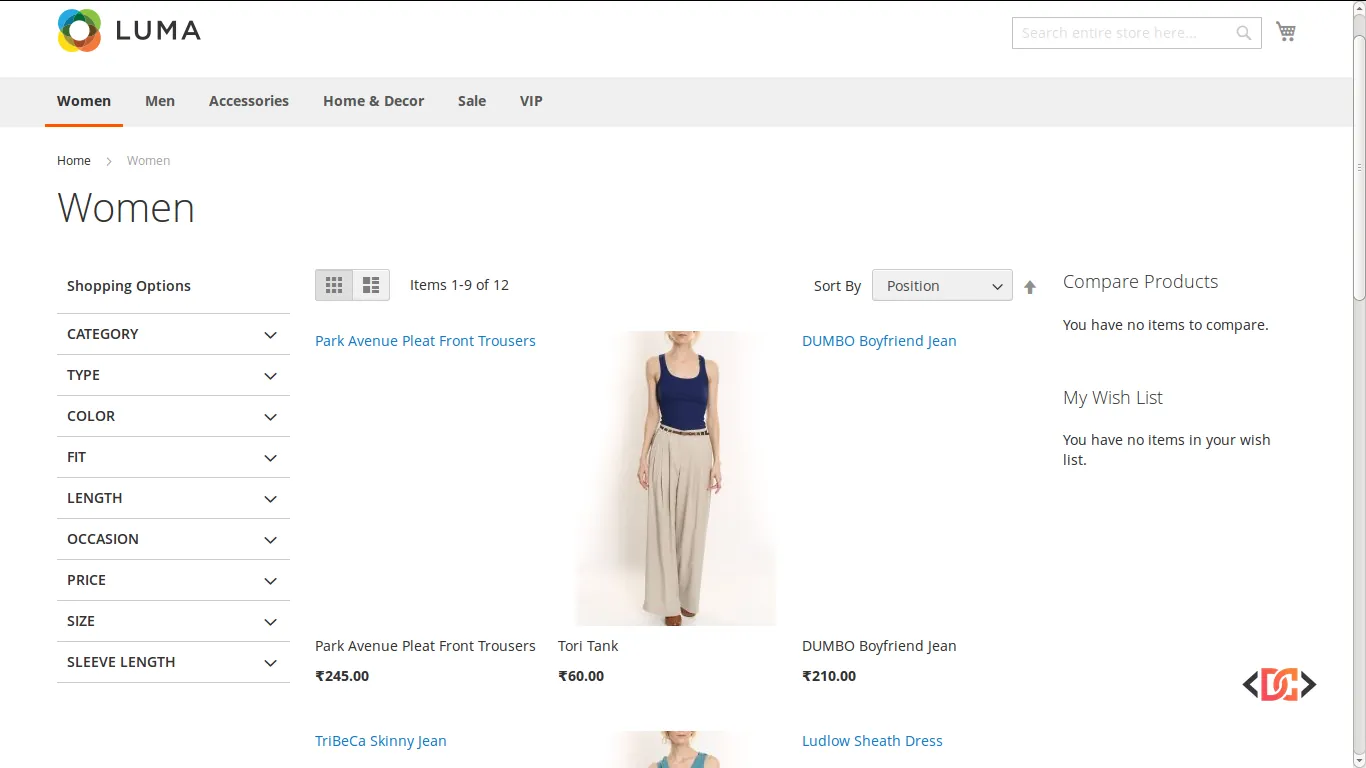
One of the most common hurdles developers face after migrating from Magento 1 to Magento 2, or even after a routine cache flush, is the sudden disappearance of product images. You might see broken image icons on the frontend, and checking the console reveals a string of 404 errors pointing to the pub/media/catalog/product/cache/ directory.
This issue occurs because Magento 2 generates specific image sizes (thumbnails, small images, and base images) on the fly or via command-line tools based on your theme's configuration. If the underlying logic that triggers this generation fails, or if the generated hash in the URL doesn't match the folder structure, your customers are left looking at placeholders.
In this guide, we will explore several proven methods to regenerate your catalog cache and ensure your product gallery displays perfectly.
Understanding the Magento 2 Image Cache Hash
Unlike Magento 1, Magento 2 uses a unique hash in the image URL, such as f9c7fbe9b524c081a3ccf800cbd963eb. This hash is not random; it is a calculated value based on the image's attributes and the requirements defined in your theme's etc/view.xml file.
If you change a setting in view.xml (like the width or height of a thumbnail), the hash changes. If the physical file doesn't exist in the folder corresponding to that new hash, you get a 404 error. This is often why simply moving the media folder from Magento 1 to Magento 2 isn't enough to make images appear immediately.
Method 1: Using the CLI Image Resize Command
The most straightforward way to fix missing images is to tell Magento to pre-generate every required image size for your entire catalog. This ensures that the cache folders are populated before a user even visits the page.
Run the following command from your Magento root directory:
php bin/magento catalog:image:resize
How it Works
This command parses the view.xml file of your active theme, identifies every required image dimension, and processes the original images in pub/media/catalog/product/ to create the cached versions.
Note: For large catalogs with thousands of products, this command can take several hours to complete. It is best to run this in a background screen or during low-traffic periods.
Method 2: Verifying Server Pass-Through Logic
By default, Magento 2 is designed to generate images on the fly if they don't exist in the cache. When a request hits a URL in the pub/media folder and the file is missing, the server should pass the request to pub/get.php, which handles the generation logic.
If your images aren't generating on page load, your server configuration might be bypassing get.php.
For Apache Servers
Check your pub/media/.htaccess file. It should contain a rewrite rule similar to this:
RewriteRule .* ../get.php [L]
For Nginx Servers
Check your nginx.conf (or the site-specific configuration file). Ensure the media location block includes the get.php fallback:
location /media/ {
    try_files $uri $uri/ /get.php$is_args$args;
}
Testing the Logic
To verify if the pass-through is working, you can temporarily place an echo "test"; die; at the very top of pub/get.php. Then, try to load a broken image URL directly in your browser. If you see the word "test", the server is correctly routing the request. If you still see a standard 404 page, your server configuration is the culprit.
Method 3: Fixing File Permissions
Even if your server configuration is perfect, Magento cannot write the generated image to the disk if the directory permissions are incorrect. After a migration, permissions are often reset or inherited incorrectly.
Ensure your folders are set to 755 and files are set to 644. You can reset permissions by running these commands from the root:
find . -type d -exec chmod 755 {} \;
find . -type f -exec chmod 644 {} \;
chmod +x bin/magento
Without the correct write permissions on the pub/media/catalog/product/cache directory, the get.php script will fail silently or log an error, leaving you with broken images.
Method 4: Handling Theme Hash Mismatches
A common edge case occurs when using custom themes. Sometimes, the catalog:image:resize command uses the view.xml from a parent theme (like Magento Luma) instead of your custom theme, leading to a hash mismatch in the frontend.
If you find that the images exist in the cache but the browser is looking for them in a differently named hash folder, try this workaround:
- Temporarily copy your custom theme's
etc/view.xmlinto thevendor/magento/theme-frontend-luma/etc/directory (backup the original first). - Run the
php bin/magento catalog:image:resizecommand again. - Flush the Magento cache:
php bin/magento cache:flush.
This forces the resize command to use your specific dimensions, ensuring the generated folders match the URLs the frontend is requesting.
Method 5: Programmatic Regeneration (Force Method)
If you need to force regeneration for specific products during development without running a full site-wide resize, you can use the ImageResize service. While not recommended for long-term production use due to performance overhead, it can be useful for debugging.
Inside a template file (like gallery.phtml), you could theoretically trigger a resize like this:
// Note: Using ObjectManager directly is discouraged. Use Dependency Injection in a proper module.
$objectManager = \Magento\Framework\App\ObjectManager::getInstance();
$resizeImage = $objectManager->get('\Magento\MediaStorage\Service\ImageResize');
$_product = $block->getProduct();
$galleryImages = $_product->getMediaGalleryImages();

if ($galleryImages) {
    foreach ($galleryImages as $image) {
        $resizeImage->resizeFromImageName($image->getFile());
    }
}
Frequently Asked Questions
Why does the resize command take so long?
Magento must open every original image file, resize it to multiple dimensions (sometimes 10+ variations per image), and save it back to the disk. For a catalog of 5,000 products, this could involve creating 50,000+ new files.
Can I skip the resize command and just let images generate on page load?
Yes, provided your server configuration and permissions are correct. However, the first user to visit a product page will experience a significant delay as the server generates those images in real-time.
I flushed my cache and images disappeared. Why?
When you "Flush Catalog Images Cache" in the Admin Panel, Magento deletes the entire pub/media/catalog/product/cache directory. If your server is not configured to allow pub/get.php to regenerate them on the fly, they will stay missing until you run the CLI resize command.
Wrapping Up
Fixing catalog image issues in Magento 2 usually comes down to three things: ensuring the catalog:image:resize command has been run, verifying that your view.xml settings are consistent across your themes, and confirming that your server is properly configured to use pub/get.php.
By following these steps, you can resolve 404 errors and ensure your product catalog looks professional and complete. Always remember to verify file permissions after any major migration or file transfer to prevent silent failures in the image generation process.